Airbrush Large Scale Painting / Interior Super Murals
Story by Kurt Sinner, published in Airbrush Magazine vol. 2.3, 1995
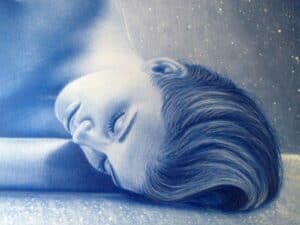
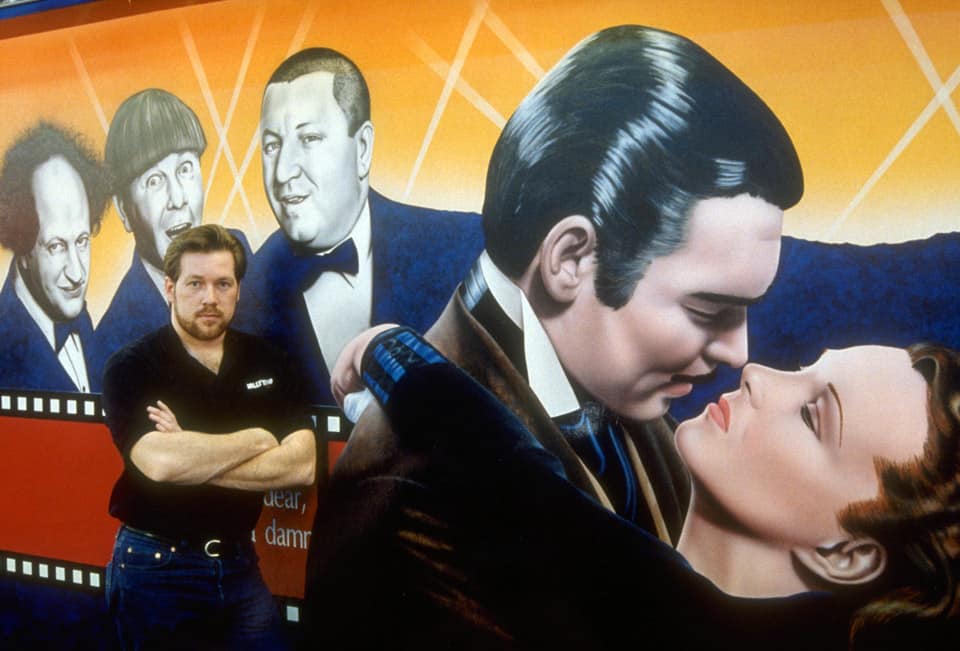
Sometimes big is better. Ask any kid if he wants a little or a big scoop of ice cream. Or ask Shaquille O’Neal… he’ll tell you. Or you might ask A.D. Cook, Portland, Oregon based free-lance airbrush artist and contemporary interior muralist: “Just give me a big wall, any Iwata RG-2 and stand back.” quips the 34-year-old Cook. Of course, it’s a little more involved than that but, for this veteran airbrusher “paintin’ large” has established Cook as one of the premier supermuralists in the Pacific Northwest. “I started airbrushing on walls when I was a 14-year-old junior high kid.” Cook says, “with a single-action Binks Wren and a can of propellant for an air source. I also used Paasche VL’s, but it wasn’t until much later, when I started using Iwata airbrushes, that I really began to enjoy airbrushing as an art form.” Initially, Cook experimented with a variety of surfaces, including automotive, T-shirts and small canvasses, but as his ability grew, so did the surface he enjoyed most. “Murals give me the freedom to express the subject matter in a way that can’t be ignored. Now I’m known for doing everything in a big way,” he says grinning. Counted among Cook’s best clients is Hollywood Entertainment. Cook’s murals helped to establish their overall corporate image. More than 90 of his movie-related murals have been reproduced and incorporated into store designs and marketing materials for over 140 Hollywood Video stores throughout the western US. “Murals give me the freedom to express the subject matter in a way that can’t be ignored. Now I’m known for doing everything in a big way.” Cook favors the Iwata line of airbrushes, using the RG-2 and W-88 for large coverage and background work while relying on the HP-BC and Micron brushes for detail work. His air sources include a two hp compressor with a 20-gallon tank along with a Whisper Jet III compressor and a nitrogen tank rented from a local welding supply for the really big jobs. He sprays water-based, non-toxic Com-Art Colors and Golden acrylics. He also employs gold leaf and iridescent interference colors in some of his mural art as well. One such piece is “Ms. Medea, a trade show background recently completed for Medea Airbrush Products. Ms. Medea was painted by Cook on three hinged, hollow-core door panels that can be folded flat for transport. “A project like Ms. Medea really gave me an opportunity to study the minute detail in a small piece of reference material and dramatically enhance it on a large scale. The use of iridescent paint, interference color, and gold leaf is simply one aspect of that enhancement.” Cook’s large, original murals now command a fairly big price, too, selling for $5,000 to $10,000 each. Clearly, A.D. Cook and his super murals have come a long, long way from the walls of his junior high school. Herein, Cook reveals step-by-step his approach to his larger-than-life interior murals.
The Working Process
Surface quality is critical to the success of any mural. Cook cannot simply hang canvas and begin to paint. “If the surface isn’t perfect, the entire image will be compromised because imperfections will eventually come through and become visible on the image.” Painting big requires a big canvas. Cook purchases canvas in 100-foot lengths measuring 10 feet wide. He custom cuts dimensions that suit the size of the job. Typically running 6 by 9 feet, 8 by 10 feet, or 10 by 15 feet, as is the case of his Star Trek painting. To begin, Cook stretches taut a seamless length of canvas, stapling it directly onto a large wall in the studio. Raising the canvas a few inches above the floor and starting from top center, he places staples one to two inches apart, working his way toward the outer edges. “I sometimes have to hire help just to stretch the canvas – it’s a real workout,” explains Cook. Next, instead of gesso, he uses acrylic-based, high-grade, interior bright white house paint. He applies a heavy, even coats with a nine-inch medium nap or sponge roller equipped with a 10-foot handle. The canvas absorbs the first coat quickly, further tightening the fabric. Cook lets this first coat dry a full 24 hours.
“I usually work from photographs. For the Hollywood Video murals, I sometimes had only a video box cover to work from.”
To eliminate the fine nap that results from the painting process, Cook carefully sands the surface with an electric orbital sander and medium 100-grit sandpaper. “I always wear a dust mask or use a professional-quality respirator when sanding,” notes Cook. He repeats the process of painting and sanding, using progressively finer and finer sandpaper until he is satisfied with the surface quality. “It usually takes three to four coats, each followed by sanding, to produce the surface best suited for mural painting.” Finally, Cook applies one last thin coat to give the surface a slight texture, simulating that of an interior wall. He also allows this coat to dry for 24 hours. One 8- by 10-foot canvas may require as much as two gallons of paint just to prep. Between coats, instead of watching the paint dry, Cook is busy working out the image composition and planning and mixing his colors. He always makes sure he has enough paint on hand and ready-to-go before beginning a mural. “Nothing’s worse than running out of a custom mixture in the middle of a piece, then trying to mix and match a new batch to the old color. Working big means using a lot of paint. I’ve found peanut butter jars and baby food bottles make convenient containers to store custom paint mixtures in; you can get the bottles without babies, too.” Cook carefully studies his reference material before any sketching or background painting begins. “I usually work from photographs. For the Hollywood Video murals, I sometimes had only a video box cover to work from.” Whatever the reference, though, understanding what’s happening with the color and how those colors are affected by light sources is just as critical to large scale work as it is to small scale work, maybe even more. Sometimes Cook will project an image onto the prepared canvas, using a slide or an Artograph projector. With a .5 mechanical pencil, he’ll very lightly sketch in just enough information for reference. He wants no pencil marks visible on the finished painting. Next, Cook masks over the main subject area, leaving only the background exposed. “Overspray always travels more than you’d expect. Thorough masking is critical.” Cook uses a 12-inch wide roll of masking paper in a hand-masker, along with 3/4-inch 3M masking tape. “Don’t compromise on masking tape – 3M doesn’t leave a residue and always comes off in one piece. Cheap tape isn’t worth expensive hassles.” For more detailed areas, Cook uses 1/2- or 3/4-inch tape, expertly forming curves and contours with the tape itself. He is careful to flatten out excess paper to avoid overspray collecting in the creases, pooling, and running back onto the exposed canvas.
For solid backgrounds, like the mountains in the T-Rex painting, Cook first fills in the area with acrylic paint applied with a large paintbrush. Once this solid color has dried, he adds highlights with the airbrush, a sponge, or a smaller paintbrush. For graduated backgrounds, like the night sky of a city, Cook employs the Iwata W-88 or RG-2, with their fine atomization capabilities, and sprays continuous motion freehand to achieve gradated effects. He may add additional highlights by spraying against loose mask acetate or, as in the case of the T-Rex background beams of light, by masking off surrounding areas with paper and masking tape, leaving the desired shape exposed and spraying in that shape. “One of the advantages of painting large is that while one area of painting dries, I can move to another area, remove some of the masking material and work on a particular detail, without affecting the area that is drying.” Once a background is finished and has dried for at least 24 hours, Cook masks it off and then exposes the face of the central image, leaving all other areas covered still. When Cook begins to give a subject its facial, he looks for the medium-range color, avoiding the lighter and darker skin tones to begin with. As the face begins to take shape, he’ll switch to an Iwata HP-BC and spray the lighter tones, followed by the darker details. Cook’s faces are principally created by freehand spraying and the gradual build-up of color. Marilyn Monroe, for example, required more than 50 separate applications of paint to achieve the exact tonal quality the artist was after. The details of a Cook face – eyelashes, lips, and eyes – often demand a good deal of loose acetate masking, fine line spraying, and hand painting. “Painting bigger doesn’t mean you get to skip the detail work. The details may be larger, but they’re critical to any piece and take hour upon hour to render.” Once a face is finished, Cook moves to other exposed skin areas, like hands and arms, before tackling hair and clothing. A single mural may take Cook two to three weeks, 12 to 14 hours a day, to complete. Cook calls out the heavy artillery or, at least, a big gun for the final stage of his super mural. Using a one-quart cup automotive paint gun, he applies a clear water-based, non-toxic semi-gloss finish to every mural to help protect the artwork. “Oil-based clears create severe health hazards, even with appropriate respirators; I won’t use them,” Cook said. “Ti=Cote» works well and is available in most areas.” He gives each mural three coats. The first is a quick horizontal misting that, when dry, helps the last two coats adhere without running. He sprays the second coat vertically and the final coat horizontally, The clear coat dries fast so there isn’t much of a wait between applications. Finally, to remove the mural from the wall, Cook again seeks outside help. Using a four-foot level and a marker, he and an assistant draw straight vertical lines inside the stapled edges on either side, as well as horizontal lines top and bottom. With a box knife, Cook carefully cuts the sides and bottom, leaving the mural hanging from the top. Next, he attaches a four-inch diameter PVC tube to the bottom and rolls the mural around the tube, image side in. When the rolled mural is near the top, he makes the final cut and his artwork is ready to install on location. His motto: A.D. Cook – Have mural, will travel.“Painting bigger doesn’t mean you get to skip the detail work. The details may be larger, but they’re critical to any piece and take hour upon hour to render.”
- About the Author
- Latest Posts
- More info

A.D. is an artist who started drawing at a young age. Throughout his life, he has worked with different creative tools in traditional and digital art and design. His art and writings are showcased in various publications such as Airbrush Action Magazine, Airbrush Magazine, American Art Collector, America’s Sports Car magazine, Art & Beyond, Easyriders, Las Vegas City Life, Las Vegas Weekly, L’Vegue, ModelsMania, Quick Throttle, The Ultimate Airbrush Handbook, America’s Sports Car, The New York Times, and The National Corvette Museum 2024 Annual Report.